How to choose the right battery to battery charger
A battery to battery charger, sometimes known as a B2B charger or DC-DC charger, is a great way to charge your leisure batteries safely and efficiently from the power of your vehicle’s alternator.
If you don’t think that you need a battery to battery charger, or you’re not even sure what they are, have a read of our What is a split charge relay? article first, where we compare split charge relays with battery to battery chargers and explain how they work.
If you’ve already decided that you do need a battery to battery charger, here’s some advice on choosing the right one for your electrical set-up.
For an overview of B2B chargers, take a look at our DC-DC battery charger page. This short guide explains all you need to know about DC-DC chargers.
Need to clue-up on some basic campervan electrics first? Have a read of our campervan electrical system guidebook page to bring you up to speed.
Battery to battery charger voltage
The first decision is the easy one – make sure you choose a charger which has a voltage rating which matches the voltage of your starter and leisure battery. Most will be 12V-12V, but if you’ve installed a 24V leisure battery, or you have a 24V starter battery, you may need a 12-24V or a 24V-24V charger. Not sure what leisure battery voltage to pick? Our article on 12V, 24V or 48V batteries can help you decide.
Next, there are two other factors to consider: the rated amperage and whether the charger is ‘isolated’ or ‘non-isolated’. Let’s cover the simple one first.
Battery to battery charger current rating
There are a couple of factors to consider when sizing a battery to battery charger:
- How quickly you want to recharge your leisure batteries
- How quickly the leisure battery you have can be recharged
The higher the current rating of a battery to battery charger, the faster your leisure battery will charge. However, the current rating is limited by your battery size and type. For most lead acid batteries, manufacturers recommend a charge current which around 0.15C, or 15% of the battery’s capacity every hour.
Lithium batteries can handle much larger charge currents than lead acid batteries and manufacturers usually state a maximum regular charge current of 0.5C, or no more than half the battery’s capacity each hour. It’s even possible to charge some lithium battery’s at 1C. However, it’s important to remember that faster charging will shorten a battery’s lifespan, so its wise not to regularly charge at 1C.
So as you can see, it’s important to consider the type of battery you’re charging when selecting the size of your battery to battery charger. Take a look at our leisure battery page for more factors to consider when choosing a leisure battery.
Calculating maximum charge current
Now it’s possible to calculate your max charging current. So, if you had a 200Ah AGM battery bank, you would use the maximum recharging current for AGM (15%). This means the maximum charger size would be:
200Ah x 15% = 30A max charge current per hour
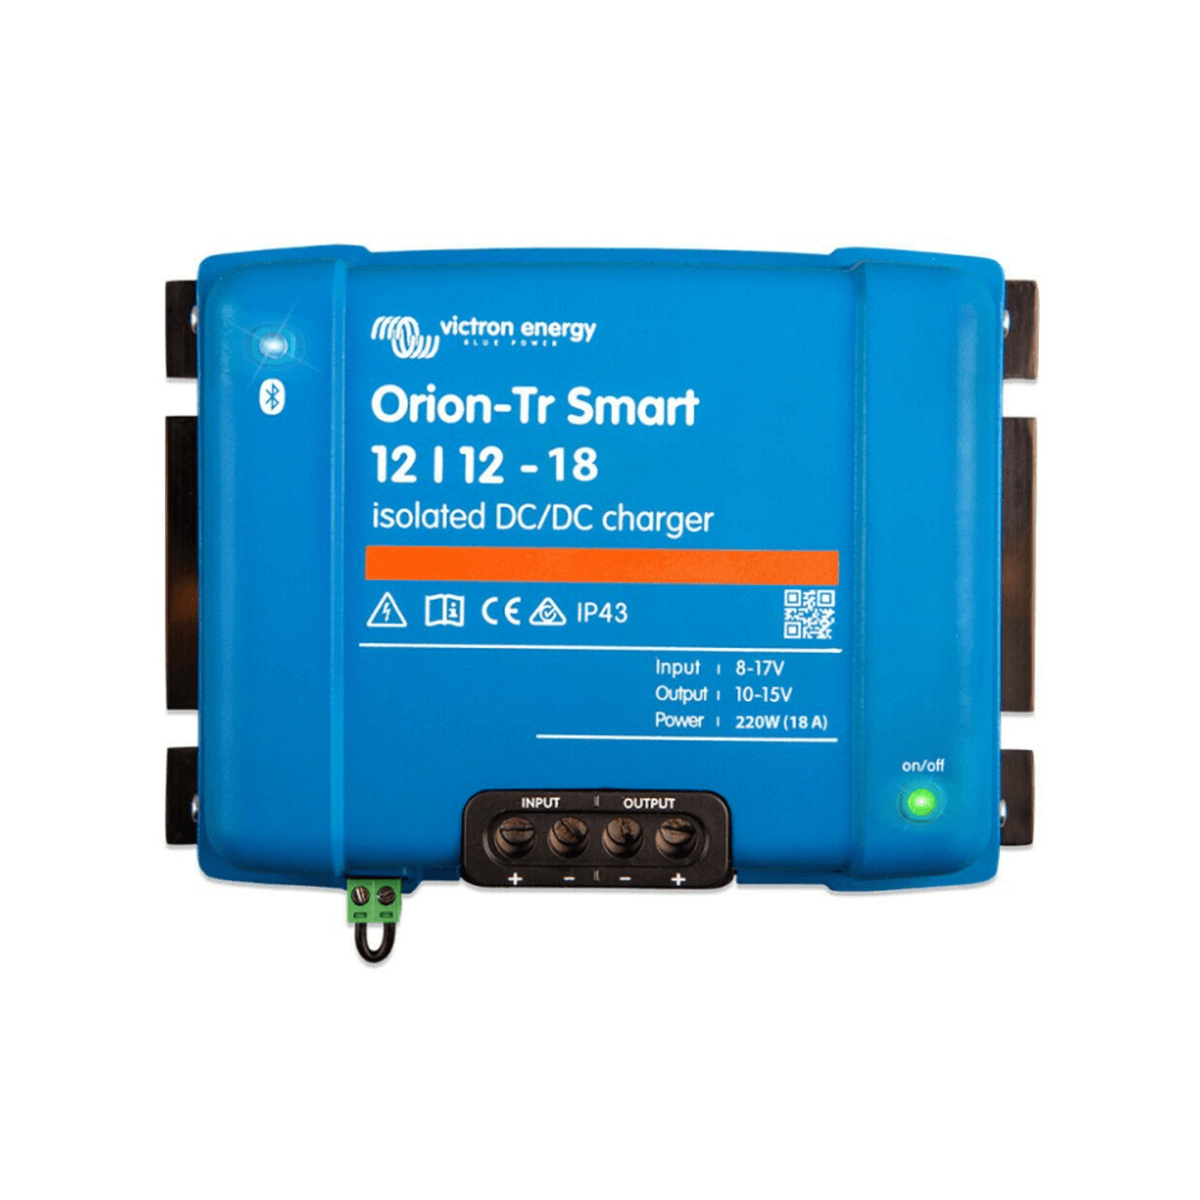
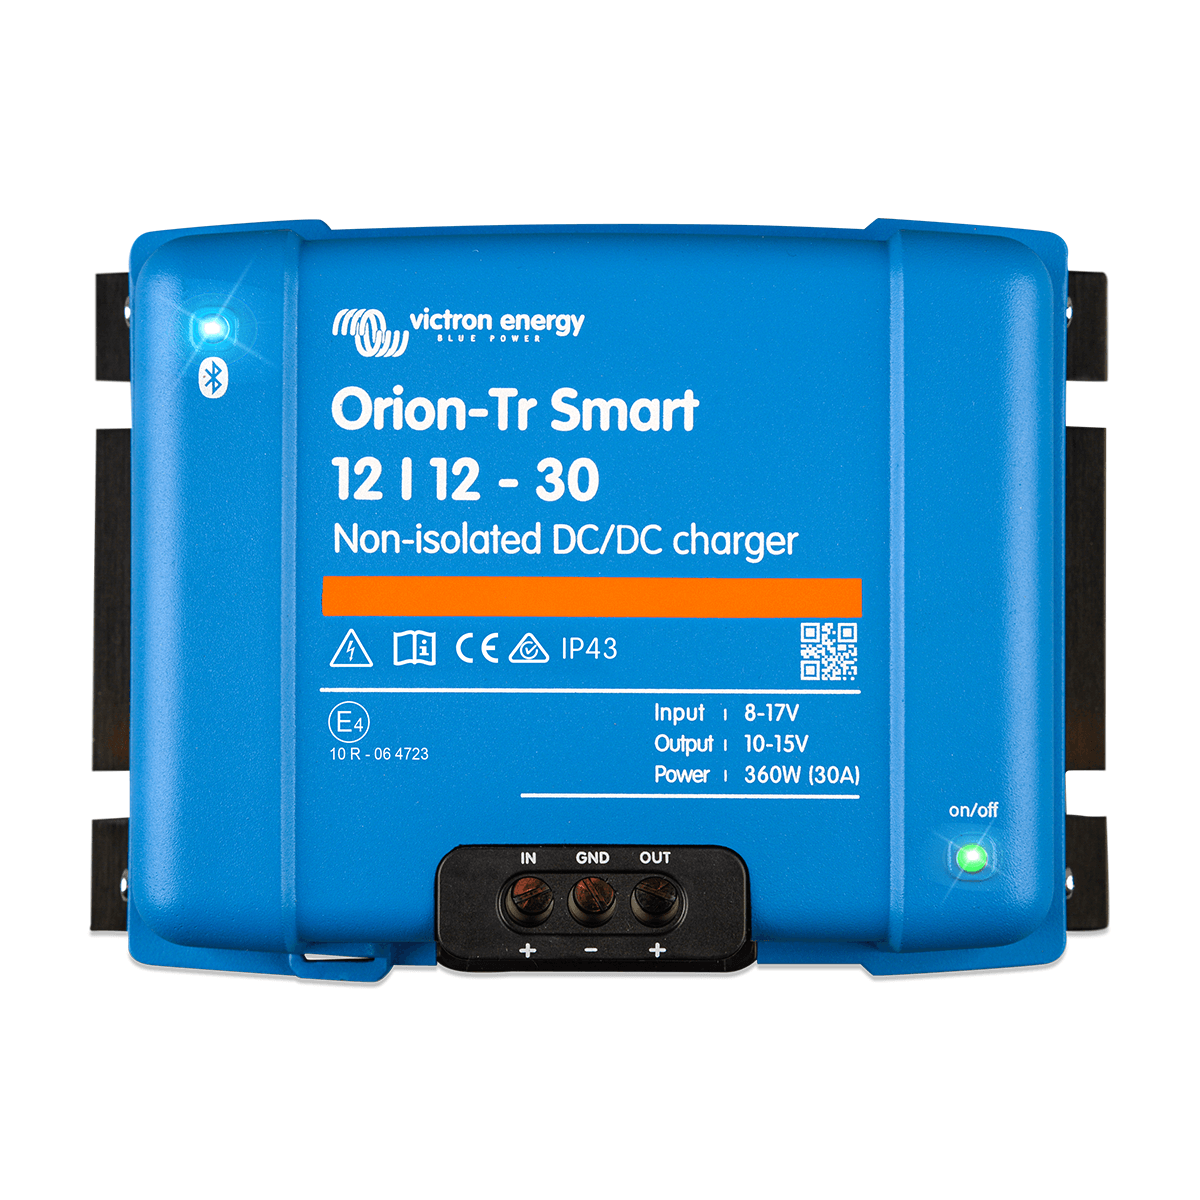
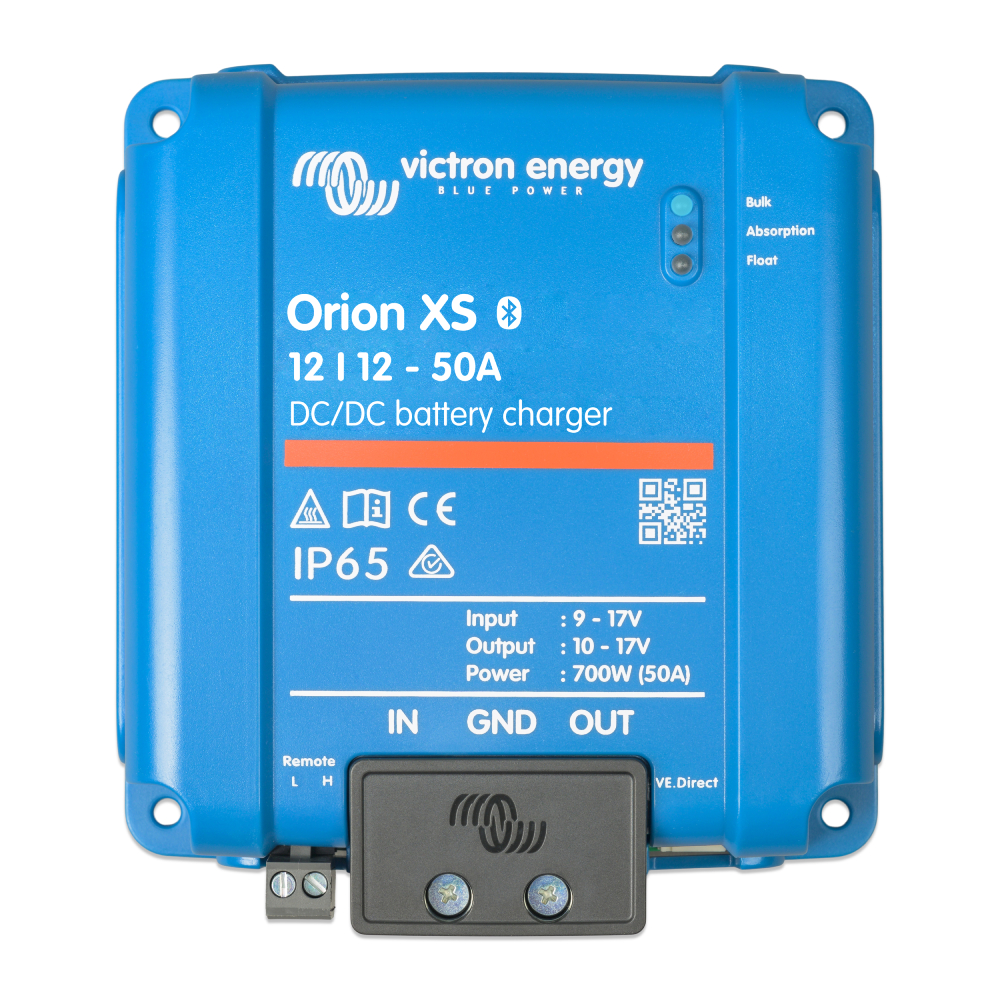
B2B chargers are available in a variety of current ratings: Victron have an 18A and a 30A Victron Orion charger. Additionally, they’ve recently released the Orion XS which is rated to 50A.
You can use just a single DC-DC converter or multiple units to achieve your desired charging current. So, if you need more than 50A of recharging per hour, you can opt for a double or triple setup. For example, 2 x 30A chargers for 60A output or 2 x 50A chargers for 100A.
Calculating usable capacity
Next, you should work out the usable capacity of your leisure battery. This is the capacity that you’re able to access. Once again, this varies with battery type. Whilst sealed lead acid batteries should only be discharged 50% of their total capacity, AGM can be regularly discharged by 80%. In contrast, it’s possible to regularly discharge a lithium battery by 90-95% of its total capacity.
So, the usable capacity would be:
200Ah x 80% = 160Ah usable capacity
Calculating recharge speed
Batteries don’t simply recharge at a constant rate – they use adaptive charging. This means they enter 3 charging stages: bulk, absorption and float. During bulk, the battery is charged at a constant current. However, once the charger enters absorption, the charger is at a constant voltage, and current is varied. Absorption can take up to 4 hours.
By multiplying the charger current rating by 90%, we can approximate the total charge time from the charger.
30A x 90% = 27A
Then, we just divide the usable capacity by our new current value to work out roughly how long it might take to recharge your battery bank:
160Ah ÷ 27A = 5.9 hours to fully recharge

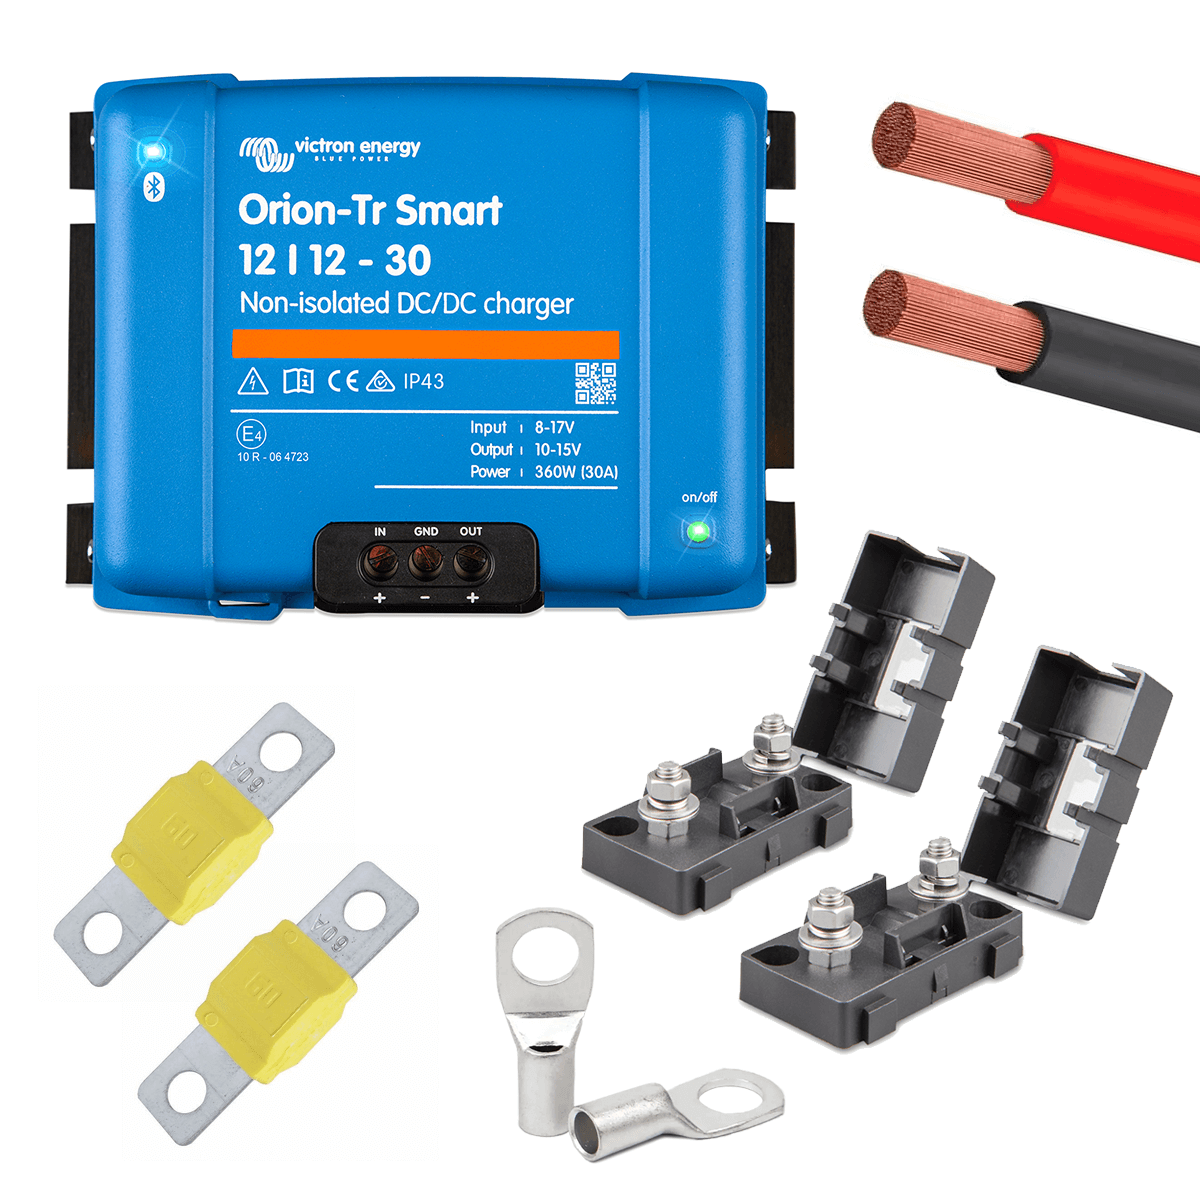
The Victron 30A Orion-Tr Smart battery to battery charger
Limitations of your alternator
If we look at another example with a 300Ah lithium battery bank, the maximum charge current would be:
300Ah x 50% = 150A max charge current per hour
You might think this means that you could purchase a 150A battery to battery charger, or connect five Victron 30A B2Bs in parallel. In reality, there is another factor to consider – the rating of your alternator.
The alternator in your vehicle is an electrical generator that uses an alternating current to convert mechanical energy to electrical energy. This outputs a maximum constant current. In most vans, this can be anywhere from 120A-250A by default.
Generally speaking, your total DC-DC charging current should be 50-60% of the vehicle’s alternator rating. The following list suggests typical alternator ratings for the most commonly converted vans.
- Mercedes Sprinter – 180A
- VW Crafter – 140A
- MAN TGE – 140A
- Fiat Ducato – 120A
- Renault Master – 150A
- Dodge ProMaster – 160A
- Vauxhall Movano – 150A
- Ford Transit – 150A
However, the rating does vary from vehicle to vehicle. So, to know for certain, you will need to try the following methods:
- Check the owner’s manual for your vehicle often contains detailed specifications, including the alternator size.
- Look under the hood. Sometimes, there is a label or engraving on the alternator that indicates its amperage rating.
- Use your vehicle’s VIN to find detailed specifications. There are online services and websites where you can input your VIN and get detailed information about your vehicle, including the alternator size.
So, for example, if your vehicle has a 140A alternator, you would be able to use up to ~84A of DC-DC recharging. If you need to access more than 50-60% of your alternator’s capacity, you can look at upgrading your alternator.
It can be tempting to go for a bigger and better DC-DC charger. But there’s a catch. Your vehicle’s alternator, which as well as recharging your starter battery, is the device that generates electricity to keep everything running. And, has its limits.
Sure, you can install a bigger DC-DC charger than what’s recommended for your alternator. But here’s where things get tricky. Your vehicle’s alternator isn’t just charging your starter battery, it’s also powering other things like your headlights, radio, and air conditioning. All these things combined draw a lot of power.
So, what happens if I ignore the suggested maximum charger current? Imagine your alternator as a power source that’s got a maximum capacity. If you push it to deliver more power than it can handle – because you’ve added a big DC-DC charger plus all the other electrical demands – you’re setting up a scenario where it’s working overtime. This can lead to a few issues:
- Just like a person who’s overworked, the alternator can get overheat and start to wear out faster.
- The extra load means the alternator might not keep up with the demands, draining your starter battery.
When your starter battery is drained, your vehicle might not start the next time you turn the key. This is because the starter battery, which is crucial for firing up the engine, needs a good amount of charge to do its job.
If you want to achieve a very high recharge current with your battery to battery charger, you may need to install a higher rated alternator. Most mechanics should be able to complete this task for you.
Connecting to the vehicle’s D+
When setting up a double or triple B2B (battery-to-battery) system in your vehicle, it is essential to run a remote cable from the B2B’s to the vehicle’s D+. The D+ terminal is a signal from the alternator that tells your B2B chargers when the engine is running. Without this connection, your B2B system won’t know when to start charging, stopping the chargers from running.
Where is the D+?
The D+ itself is a terminal on the vehicle’s alternator, and subsequently often a pain to locate and connect to. Thankfully, we have a work around for you. Your vehicle’s 12V fuse board supports various ignition-controlled fuses, meaning that power only passes through the circuit when the ignition is on. Using trial and error or digging your vehicle’s handbook to locate a load that only turns on with the ignition on, you can then connect your remote cables to this same terminal.
The remote cable of an Orion DC-DC charger typically only carries a very low current 10-20mA, just enough to act as a control signal to turn the charger on or off. Because of this, you won’t need to change the fuse you piggy back off as the additional load is so marginal.
Remember, there’s a significant difference between having the vehicle’s key in the ignition with the lights working and the engine/alternator running. If you connect to a circuit that activates when the key is in but the engine isn’t running, it will turn the chargers on and quickly drain your starter battery.
Isolated vs non-isolated battery to battery chargers
So now that we’ve talked about charge current, there’s the not so simple matter of isolation to cover! What is the difference between an isolated and a non-isolated battery to battery charger?
An isolated B2B charger is used when each battery (i.e. the starter battery and the leisure battery) is grounded separately: they are isolated from each other.
A non-isolated B2B charger can be used when the two batteries (starter and leisure) share a common ground.
Notice how the isolated charger has two separate negative connection ports for the input and the output battery, whereas the non-isolated charger has only one. The tricky part is understanding when you might need an isolated DC-DC converter. Below we explain exactly when you need to use an isolated battery to battery charger.
When to use an isolated B2B charger
An isolated battery to battery charger should be used if your starter battery and your leisure battery don’t share a common ground. Most campervans will use the vehicle chassis as a ground between both batteries, and this is often known as a ‘common chassis ground’. Because the chassis is made of metal, when two points are grounded to it in separate parts of the vehicle, they are connected through the metal bodywork of the van.
However, some off-grid systems, such as those with composite motorhome bodies and fibreglass boats, may not use a common grounding point. In these examples, both batteries will be ground separately, and the two grounds are not linked, because the points they are grounded to are not connected.
An isolated battery to battery charger is also necessary if the charger will be used to power any equipment which is sensitive to electrical noise, such as navigation and radio equipment on boats, sensitive medical equipment or hi-fi systems. An isolated battery to battery charger allows the power to flow from the source to the leisure battery, but ensures that there is no direct conduction between the two circuits; this is called galvanic isolation. Instead, the energy flows through a magnetic field – this is usually achieved with a transformer.
Because the input and output are galvanically isolated, any electrical noise generated from the alternator is filtered out, creating a much cleaner power source. In a non-isolated charger, any noise from the input is transmitted through to the output.
This circuit isolation is also useful for breaking up ground loops. Ground loops occur when two grounding points in a circuit, which are both supposed to be at 0V, actually have a small voltage difference. This causes a small current to flow between them in a ‘loop’ which creates electrical interference. When an isolated battery to battery charger is used, the batteries don’t share a common ground, and therefore the possibility of a ground loop is removed.
Although they are usually more expensive, if you’re in doubt, you should install an isolated battery to battery charger since they will work in any electrical setup. However, if you are confident your system is suitable for a non-isolated battery to battery charger, this will save you around £60.
B2B charger kits
Do you want to install a battery to battery charger but you’re not sure what you need? Our battery to battery charger kits include every single component you need to successfully install a battery to battery charger as part of your campervan electrical system.
Still not sure what you need Need some help with the rest of your electrical system? Try out our free electrical system design service where we’ll do all the calculations for you! All you need to do is answer a series of questions about your usage and we’ll take care of the rest. We provide a bespoke proposal for your system for free, and if you purchase your components through us, we’ll also give you a free bespoke wiring diagram.
Campervan electrics leaving you confused?



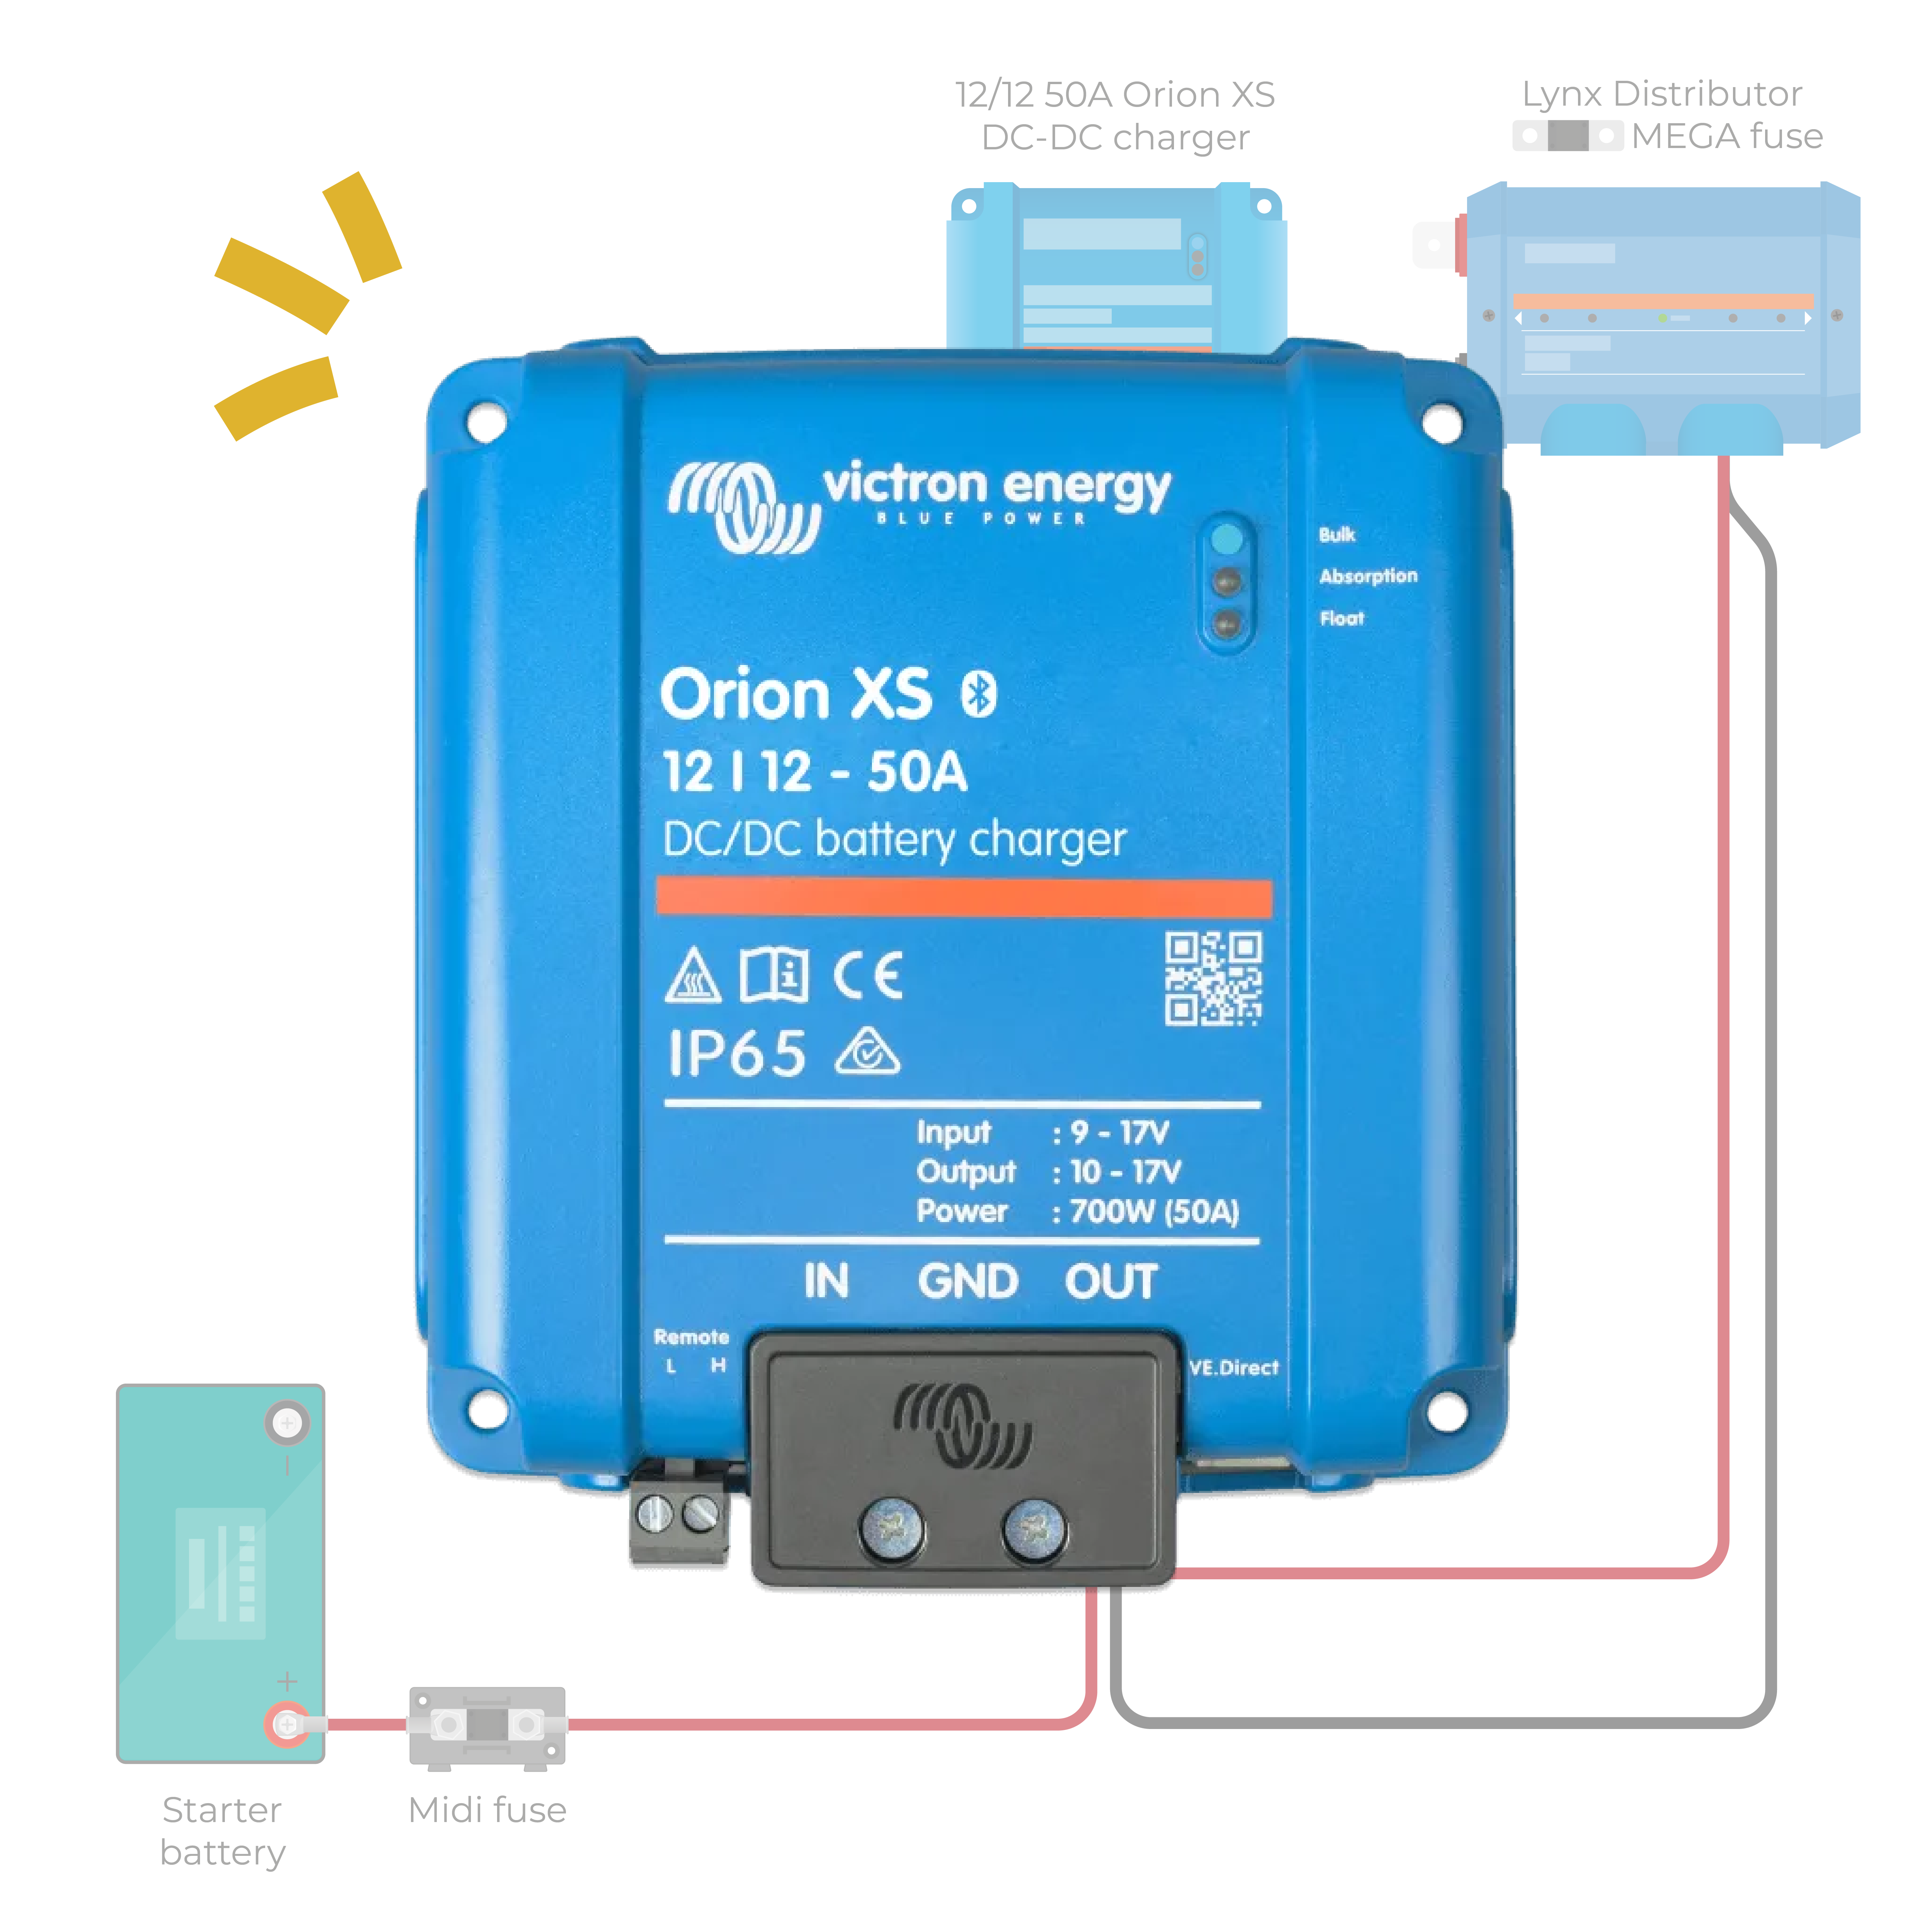
 Wiring diagram included
Hi thanks for this guide. Do you mind explaining why the diagrams show that the fuse on the positive leisure battery side needs to be close to the bus bar, as opposed to close to the DC-DC charger? I’m still in the research phase so my understanding is extremely limited, but I must have read somewhere that the fuse goes close to the source of the current (in this case the charger) to protect the wire. Thanks 🙂
Fuses should always been installed as close to the battery as possible. So in the case of a battery to battery charger, the fuse protecting the starter battery should be next to the starter battery, and the fuse protecting the leisure battery should be next to the busbar. The purpose of the fuse is to prevent the wire overheating in the event of a fault or short, so you want to minimise the amount of cable between the battery and the fuse.
Hello, I have 2 x Exide EP1500 Dual AGM Battery 180Ah Would it be ok to fit a 60amp DC to DC . I currently have a 30amp victron but it’s not giving me enough charge for my needs. I was thinking of getting the Sterling 60amp model as Victron only do 30amp
Kind regards
Trevor
Hi Trevor, it’s recommended to recharge AGM batteries at C1 (10% of their total capacity), but you can recharge them at up to C2 (20% of their total capacity) without affecting their lifespan too much. So for your 360Ah battery bank, 36A per hour would be the C1 and 72A per hour would be the C2. Therefore it should be fine to use a 60A B2B rather than a 30A. It’s possible to connect two Victron Orion B2Bs in parallel to achieve 60A rather than 30A recharging per hour. Pop me an email at [email protected] and we’d be happy to help you with all of the required components and a wiring diagram of how to connect everything. Thanks!
I have seen some debate about where to mount the B2B charger. I have just received all my kit from yourselves, and starting to think about where all the kit has to go! Some videos say that the box should be as close as possible to the starter battery, others have it on the panel at the rear quarter. Is there an electrical “efficiency” issue that suggests where it should go? (I would prefer the rear quarter of the sprinter van along with all the other boxes). Thanks
Hi John,
First of all, thanks for buying your system from us!
A battery-to-battery (B2B) charger should be mounted as close as possible to the leisure battery as possible (in your case the rear of the vehicle). The reason for this is to reduce voltage drop and ensure that the full charging voltage is being delivered to the leisure battery.
If the B2B charger is mounted too far away from the leisure battery (close to the starter battery), the voltage drop can reduce the effectiveness of the charger and limit the amount of energy that is transferred to the battery.
Hope this helps!
I am looking for advice please. I have invested in a 100ah LiFepo4 leisure battery. my old lead leisure battery was charged via split relay and solar. I am looking at a b2b system instead of split relay to charge the LiFepo4 as this is recommended. I’m confused by what amp charger I should get. my starter battery is 12v lead acid, leisure battery is 12v 100ah LiFepo4. vw aircooled engine alternator. please could you advise as i appreciate lead and lithium require different charge levels. hope to hear from you soon. thank you
Hi Naomi, you could use a non-isolated DC-DC charger, but our experience with older VWs is that you are better off having a direct earth, like in the isolated charger kits. It is worth looking up the maximum charging current of your specific battery and choosing the charger size appropriately.
Something you’ll need to consider with your setup is the alternator’s ability to give out enough charge. We would strongly advise looking into upgrading it. Most alternators will only comfortably provide around 50% of their rated power at engine idle speeds before overheating. With your van running with fans and lights on it is likely to be taking all available ‘juice’ as it is.
Hi , firstly thanks for your guide it’s very usefull , I’ve just purchased a 12v 130Ah AGM leisure battery, as far as I can gather from your guide I would require a 12v 20Amp btb charger , any advice most welcome .
Hi Mick, we’re so glad you found the guide useful! If you pop the team a message here then one of our fantastic engineers will be in touch to advise 😊
Hi, I wish to fit an under-seat Fogstar battery to my Ducato based motorhome (3.0l 2016). At present the 2x110ah lead acid batteries are in the rear ( approx 5.5m distance from them to the starter ) where all the current fuses and distribution box are located. By having the Fogstar under-seat close to the main starter battery ( distance max 750mm ) what would be a safe distance to locate the B2B ? Does it need a lot of “air-space” to cool or if space allows can it be fitted under the same seat ? What would be the best minimum distance to site it otherwise from the leisure battery ? Thanks
Hi Mark, the B2B can be in relatively close proximity to the leisure battery, but they do run hot, so we wouldn’t recommend positioning them in the seat base with the Fogstar battery. Separately, if you wish to keep most of your system, inc distribution at the rear of the van, it would be worth considering mounting the leisure battery there rather than under the seat base as you would need significantly thicker cable to reduce voltage drop over that long length!